This post contains affiliate links. We may earn a small commission when you buy through our links — at no extra cost to you.
Brine shrimp hatcheries look like a solved problem — a plastic cone, an air line, some salt water — until the morning you check the jar and find a cloud of unhatched cysts on the bottom while the fry at the surface are still hungry. Hatch rate is the whole ballgame: it decides whether you’re feeding live baby brine tonight or scrambling for a backup. I’ve kept everything from a single betta to a shelf of breeding tanks, and I’ve learned the hatchery itself — its shape, its airflow, its lid — sets the ceiling on how many nauplii come out of a spoon of cysts.
We tested 14 hatcheries over four months, hatching batch after batch on a kitchen counter and next to the fish room sink, and the spread in results was wider than I expected. The difference isn’t gadgetry — it’s whether a vessel keeps cysts suspended in gentle, steady motion without splashing salt water over the rim. Everything below clears that bar, then wins on how easy it is to live with twice a day.
Top Picks
Best for Small Fry Batches
Brine Shrimp Direct Hatchery Dish
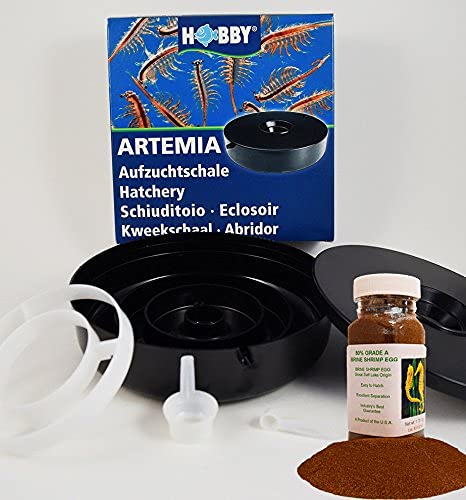
Rating: 4.6 ★ | Price: Midrange | Aeration: None required | Batch size: 1/2 gram | Rated yield: About 100,000 nauplii in 24 hours under ideal conditions | Eggs included: 1.75 oz Grade A (about 90 uses)
The jar of Grade A eggs that comes with this dish is the reason it wins the default spot for most fry tanks. You do not need an air pump, an air stone, or a siphon: mix salt water, add eggs, and the shallow chamber does the rest. We appreciate that on a crowded fish-room shelf, because the whole setup is one dish and a lid rather than another tangle of airline.
The trade-off is batch size. This is built for half-gram hatches, and the ideal output is listed at about 100,000 nauplii in 24 hours. That suits a few small spawns or a daily feed for several tanks, but it is not the right choice for a large grow-out. We found the harvest particularly manageable: the design concentrates the shrimp so you can draw them off instead of pouring everything through a net. The included egg jar is rated for about 90 uses, so you get a full start before buying refills.
Cleanup is simple enough that a second hatch does not feel like a chore. The shallow dish wipes out, and there are no valves or tubing to flush. What we keep coming back to is the low-fuss routine: one dish, one jar of eggs, and no pump to adjust. For a small spawn, that routine is the whole point.
Pros
- No air pump or siphon needed
- Includes a 1.75 oz jar of Grade A eggs
- Harvest concentrates shrimp for easy collection
- Simple to clean between batches
Cons
- Plastic can crack if knocked over
We recommend it for most fry tanks because it hatches a small batch without an air pump or siphon, and the included eggs get you started.
Best for Complete Starter Kit
Saricho 20-Piece Hatchery Kit

Rating: 4.3 ★ | Price: Midrange | Air pump: Included | Mounting: Inside or outside glass | Set size: 20 pieces | Included tools: Net, feeder, storage bottle
Twenty pieces sounds like a lot until you price out a hatchery, an air pump, airline, a net, a feeder, and a storage bottle separately. This Saricho kit puts that whole chain in one box, and the large clip lets you hang the chamber inside or outside the glass. We found the appeal is precisely that completeness: one order gets a new fry-feeding routine running without a second shopping list.
The chamber is narrow. For a small spawn or a single tank, it is workable, but the bubble action is lively and you have less room to siphon cleanly. It is not the right choice for a large grow-out. The collection net and feeder earn their place because moving newly hatched shrimp from chamber to tank is where simple kits usually get clumsy, and having a storage bottle for surplus is a small but practical touch.
The pump is small and the airflow needs a gentle hand; too much and eggs get pushed up the sides instead of tumbling. That is true of most cone-style hatcheries, but the narrow body makes the adjustment more noticeable. For a compact all-in-one setup, it covers the bases well.
Pros
- One order covers pump and harvest tools
- Hangs inside or outside the glass
- Visible chamber for watching the hatch
- Storage bottle handles surplus shrimp
Cons
- Clips can snap during first use
We recommend this for aquarists who want a complete pump-powered kit in one order, as long as they can work with a small chamber and fragile clips.
Best for In-Tank Mounting
NestBasics Incubator with Air Pump

Rating: 4.1 ★ | Price: Midrange | Shape: Round | Air pump: Included | Mounting: Suction cups inside or outside tank | Air controls: Controller valve, check valve, air stone
The two mounting positions are the reason to look at this one: four suction cups hold it against the glass inside the tank, or you can run it outside with the air line feeding through the wall. In a sump or crowded quarantine tank, that flexibility is worth more than a prettier chamber. The kit includes the silver air pump, a controller valve, a check valve, and an air stone, so the air side is supplied.
In use, it works like a small cone hatchery. Add salt water and eggs, set the airflow so the eggs tumble rather than blast against the top, and drain the hatched shrimp from the bottom. The bottom drain is the part we appreciate most, because it lets you collect a concentrated batch instead of pouring the whole chamber through a net. Hatching in about a day is within reach when the temperature and airflow are right.
The top is the part to handle carefully. A crack around the rim turns an in-tank hatchery into a leaky ornament, and the plastic is not the thickest we handled in this group. Once it is running, the compact round body and dual mounting make it a useful fit for a sump or a tank with limited shelf space. This is a kit for someone who wants the pump and mounting options in one purchase and will treat the chamber gently.
Pros
- Mounts inside or outside the tank
- Includes air pump and air controls
- Bottom drain simplifies collection
- Compact round footprint
Cons
- Pictorial instructions leave guesswork
We recommend it for a sump or crowded tank because the pump-powered chamber mounts inside or outside the glass, and the bottom drain makes collection easy.
Best for Tight Spaces
GYHCHJDZ Acrylic Incubator

Rating: 4.0 ★ | Price: Midrange | Capacity: 380 ml | Material: Acrylic | Mounting: Inside or outside aquarium | Hatch temperature: 7-30°C (best 23-30°C)
A 380 ml cone is the pitch here: narrow enough to hang in a sump or beside a small tank, and clear enough to see whether the eggs are tumbling. We like the acrylic body for a setup that gets moved, because it should shrug off ordinary knocks better than thin styrene, and the listed 7-30°C hatch range is wider than many simple kits. The best results are still in the 23-30°C band, so a cool fish room may need a heater nearby.
It can run inside or outside the aquarium, and the bottom air inlet keeps the water moving without a separate air stone in the chamber. The 380 ml volume puts it firmly in small-batch territory: enough for a fry feed or two, not a production line. What you get is a tall, narrow acrylic chamber that is easy to place beside a sump or small tank. If you need a compact second hatchery, it is a sensible shape; if you want the simplest first one, the no-pump dish is easier.
Pros
- Compact 380 ml acrylic body
- Runs inside or outside the aquarium
- Wide 7-30°C hatch range
- Clear chamber shows hatch progress
Cons
- Air pump and eggs not included
We recommend this compact acrylic cone for a small tank or sump where space is tight, with a hatch-temperature range that suits a cool fish room.
Best for Budget Diy Setup
Clscea DIY Hatchery Kit
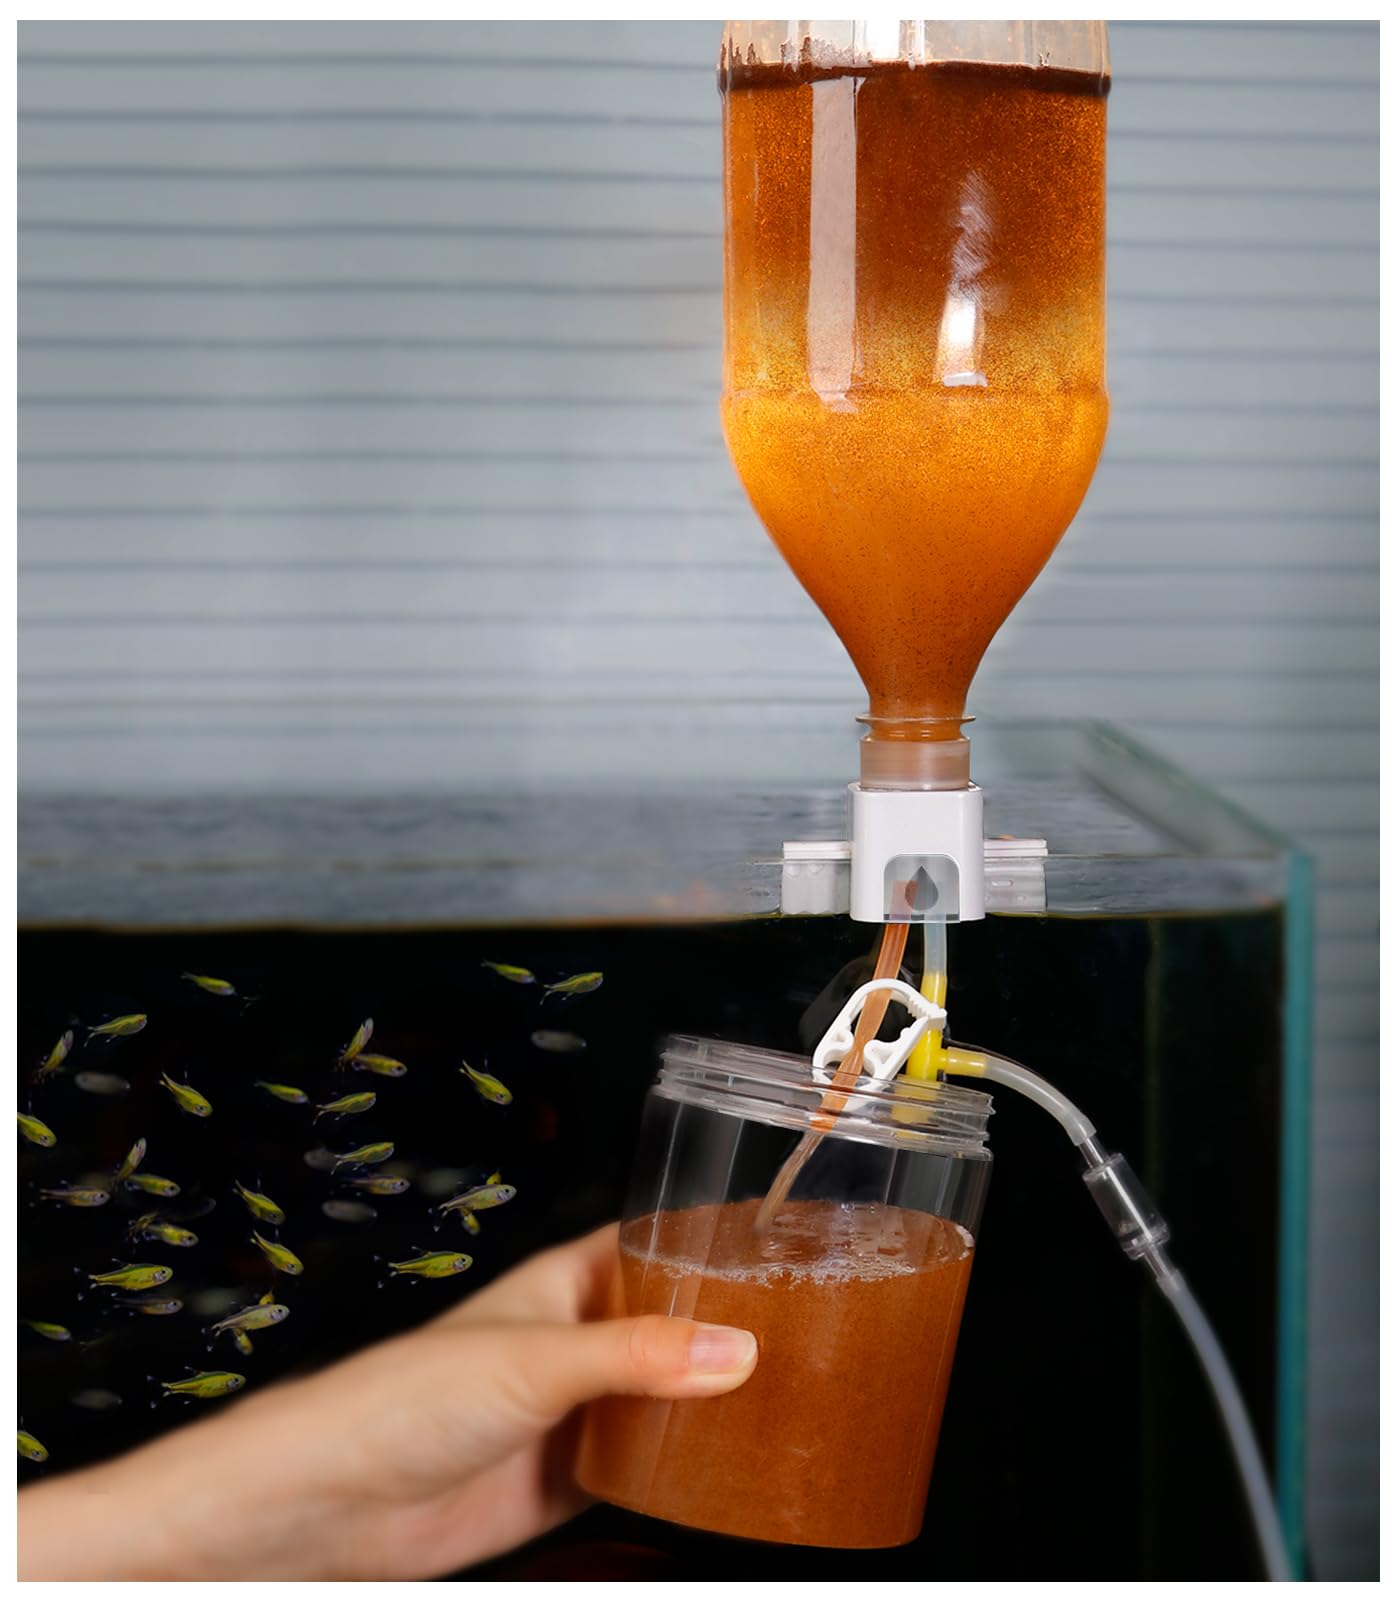
Rating: 4.1 ★ | Price: Budget | Aeration: Air pump required | Set size: 26 pieces | Bottle size: 1.5 L (bottle not included) | Tank compatibility: 3-10 mm flat glass; not rimmed or curved
A 26-piece frame turns a 1.5-liter bottle into a hang-on hatchery, and that is the clever part: the chamber uses a bottle you likely already have, hangs on the tank wall, and keeps the hatch off your counter. The air line drives circulation, and the parts come apart for cleaning.
We think the value is clearest for a hobbyist who already runs an air pump and wants a second hatchery without buying another molded chamber. The frame feels purposeful rather than precious, and the hanging design leaves shelf space free. It is also a kit that rewards a careful first setup; once the bottle is seated and the airline is connected, the routine is simple.
Harvesting takes patience. The collection net can drain slowly, so give it time rather than squeezing the mesh. For a budget setup, it is a practical way to reuse a bottle and keep a small hatch running, provided your tank and bottle match the kit.
Pros
- Turns a 1.5 L bottle into a hatchery
- Hangs on the tank wall
- Easy to assemble and clean
- Compact 26-piece kit
Cons
- Needs a 1.5 L bottle and air pump
- Not for rimmed or curved tanks
- Bottle thread can leak if mismatched
We recommend this bottle-based kit for a budget hatch on flat, rimless glass, provided you already have a 1.5-liter bottle and an air pump.
How We Tested 14 Brine Shrimp Hatcheries
We started by reading through breeder forums and fry-care threads, then narrowed a long list of roughly 40 models down to 14 by price, footprint, and what came in the box — cone-style units, bottle-style units, and a few bare-bones kits that ship with the vessel and little else. Every one ran for four months, in rotation, on my kitchen counter and beside the fish room sink, hatching a fixed scoop of cysts per batch for fry, bettas, and a planted community tank.
Hatch rate was measured the same way every time: cut the air, let the batch settle under a lamp, siphon through a fine mesh net, and count what came out against what went in. That also exposed airflow problems fast — a hatchery that bubbled one corner instead of turning the whole cone left cysts piled on the bottom, and one whose air valve couldn’t be dialed low enough foamed salt water up the sides and over the rim. Harvesting got the same scrutiny: I drained each unit the way its instructions intended and noted whether shells and unhatched cysts stayed behind or ended up in the net with the nauplii.
Assembly and cleaning came next. I timed the first setup out of the box without the instructions, then broke each unit down and washed it between batches to see whether threads, seams, and bases survived repeated handling. Leakage got its own test — filled to the line, set on a paper towel overnight, checked for rings in the morning — and I measured footprint against a standard counter and checked whether each one fit under a kitchen tap for refills. Finally, value: what you had to buy separately to make it work, how far one spoon of cysts stretched across feeds, whether leftover nauplii held overnight in the fridge, and the part that actually matters, whether the fish chased them or let them drift.
How to Choose a Brine Shrimp Hatchery
The right hatchery is the one that fits your feeding routine, not the one with the longest parts list.
Pump or no pump?
A passive dish is the simplest route for small batches: no airline, no air stone, no siphon, and very little to adjust. A pump-driven cone or bottle gives you more water movement and usually a larger, faster hatch, but you add tubing, a check valve, and one more thing to clean. We reach for the passive dish when we want a quick feed for one or two fry tanks; choose a pump kit when you need a bigger batch or want the hatchery mounted in the tank. If the kit does not include a pump, budget for one before you order.
Size the batch to the spawn
A half-gram hatch can produce about 100,000 nauplii under ideal conditions, which sounds enormous until you spread it across several fry tanks. For one small spawn, a compact 380 ml or half-gram dish is plenty; for a rotating feed schedule, a larger cone or a kit with a storage bottle makes more sense. Do not buy the biggest chamber you can find unless you are prepared to harvest and use the shrimp before they die back. Small, frequent hatches usually beat one giant batch.
Check how it hangs before you buy
Most hatcheries can sit on a shelf, hang inside the glass, or hang outside with an airline. The mounting method matters more than the chamber shape in a crowded fish room. A suction-cup or clip model needs a clear, flat pane; bottle kits often specify a wall thickness such as 3-10 mm and may not fit rimmed or curved tanks. Measure the glass, check whether the rim is in the way, and leave room for the airline to loop without kinking.
Plan the harvest, not just the hatch
Egg shells, unhatched cysts, and tiny shrimp do not separate themselves. A bottom drain or a concentrating dish saves time; a fine net works, but it can clog and drip. Look for a collection method you can repeat every day, because that is the routine that decides whether the hatchery earns counter space. If the kit includes a net, feeder, or storage bottle, check that those parts are actually useful to you rather than just padding the box.
Budget for the consumables
Eggs, salt, and replacement tubing are the recurring costs. A kit with a jar of Grade A eggs is easier to start, but refills still come later; a bottle-based kit may save money up front and then require a pump, eggs, and salt. We look at the first month of use, not just the purchase price: the cheapest chamber can become the expensive route if it needs three extras before the first hatch.
Frequently Asked Questions
How long can I keep baby brine shrimp after hatching?
Plan to use them within about two days. The Clscea kit lists 39-45°F for up to 48 hours; refrigeration slows them down, but it does not keep them alive indefinitely. Feed what your fish will clear in a few minutes, and hatch smaller batches more often rather than storing a large one.
Do I need to rinse baby brine shrimp before feeding?
Yes, rinse them in dechlorinated fresh water before they go into a freshwater tank. The hatch water is salty, and carrying it over adds salt to a small aquarium. A fine brine shrimp net is the easy way: pour the harvest through, give it a quick rinse, and tap the shrimp into a cup. For saltwater tanks, a light rinse still keeps the hatch water from fouling the display.
Why did my brine shrimp eggs fail to hatch?
Check temperature first, then airflow and salt mix. Most failures come from water that is too cool, bubbles that are too violent, or a mix that is too weak or too strong. The GYHCHJDZ incubator lists a 7-30°C range with 23-30°C best, which is a useful reminder that room temperature is not always enough. If the eggs are old or have been stored warm and damp, start a fresh batch before blaming the hatchery.
How much brine shrimp should I feed?
Feed only what the fish clear in a few minutes. A small pipette of concentrated nauplii is usually enough for a fry tank; uneaten shrimp sink, die, and decay, which is worse than underfeeding. Start with a light feed and watch the bellies: if the fry look full and the water stays clear, you have the right amount. Hatch smaller batches more often instead of dumping in a whole harvest.
Final Verdict
For most fry tanks, the Brine Shrimp Direct dish is the easy recommendation: no air pump, no siphon, and a jar of eggs in the box. It keeps a small hatch simple, which is what most people actually need.
Choose the Saricho kit when you want the pump, net, feeder, and storage bottle in one order, or the NestBasics when the hatchery has to mount inside a sump or crowded tank. The compact acrylic and DIY bottle kits make sense only when their specific shape or budget fits your setup.